Setting up CKEditor (Text Editor WYSIWYG)
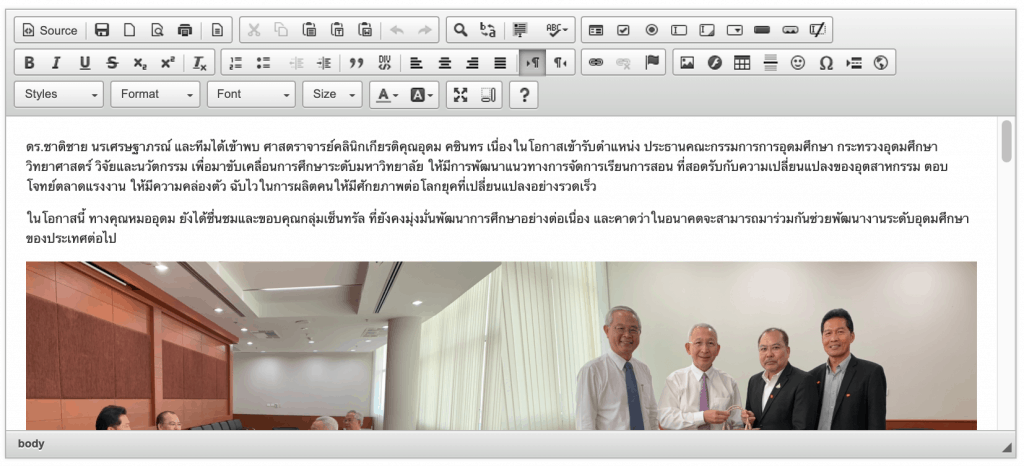
CKEditor is Tools It allows users to write articles or create blogs on websites conveniently without the need for users to write any HTML code. They just need to use Microsoft Word regularly and they can use it. The CKEditor that is used allows for free text customization. We can add color, font size, links, front text, italicize, align left, align right, insert images easily, just like using Microsoft Word.
Get to know the tools
There are many pre-installed tools, some of which are not really used, so I will only introduce the ones that are necessary for writing a blog.
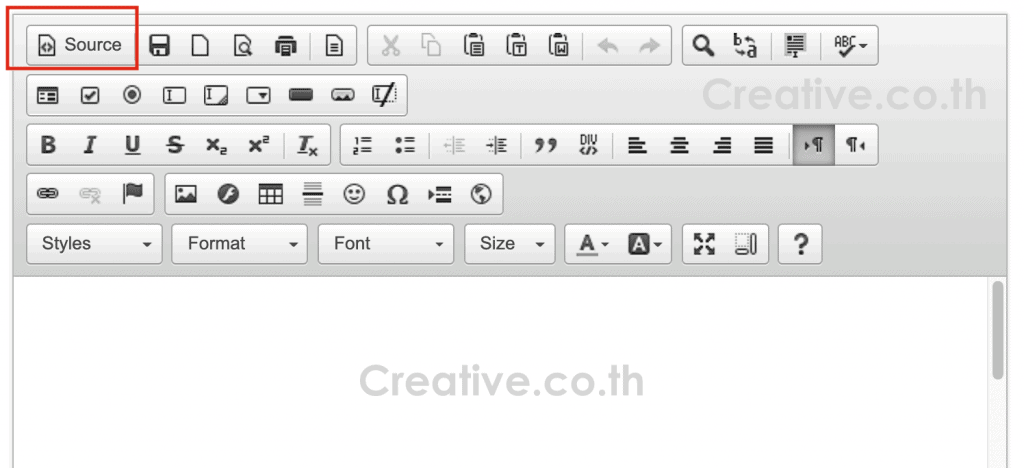
1. Source It is a tool for inserting HTML language, suitable for those who have basic HTML knowledge or for inserting source code copied from other websites such as YouTube, etc.
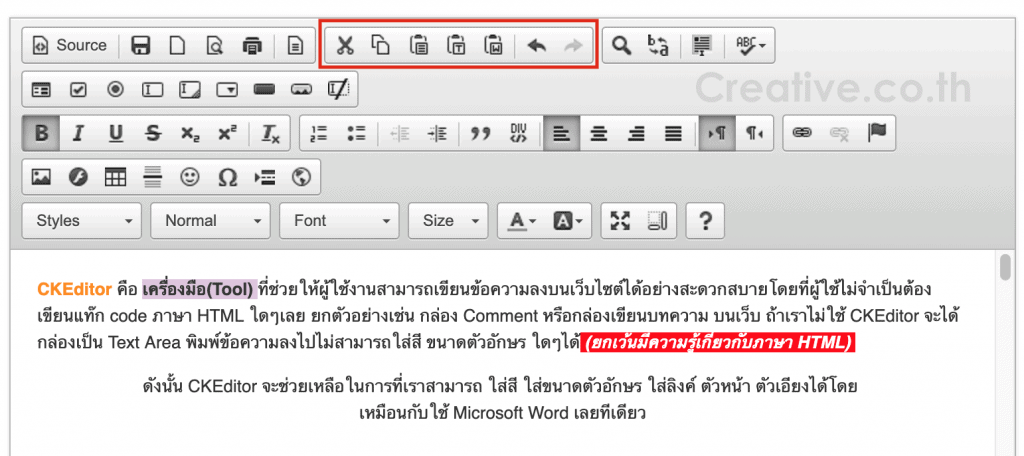
2. Edit Tools It is a group of tools for cutting, copying, pasting text (or if you are comfortable using shortcuts, press Ctrl+X, Ctrl+C, Ctrl+V) or if you want to reverse the edits, press the Undo or Redo buttons.
3. Format Font Bold, italic, and underline are commonly used tools to emphasize important text, or you can use the side tools to add exponents.
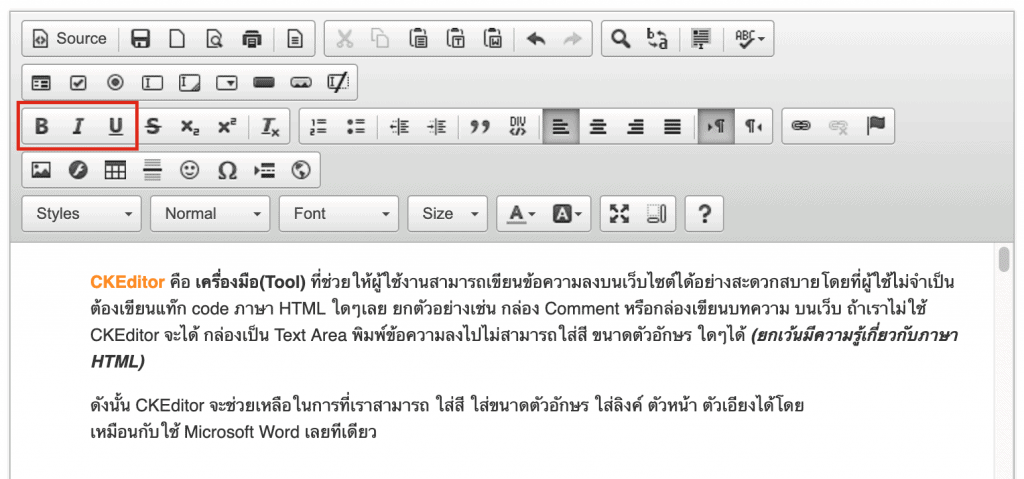
4. Text Format Will consist of
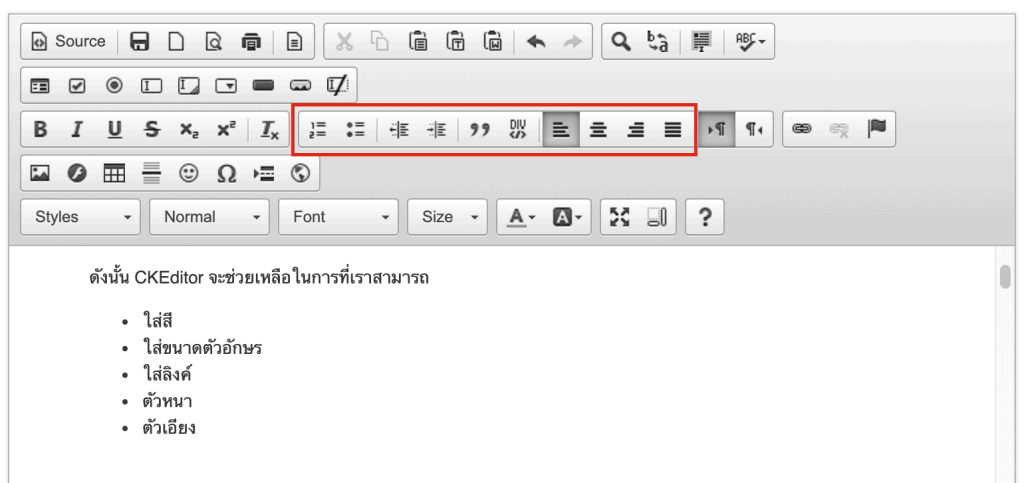
- Numbered list , Bulleted list Used to organize text that is divided into several sub-topics, such as:
-
- Text title here
- Text title here
- Text title here
- The next one is Decrease/Increase Indent For adding/reducing paragraphs
Block quote For emphasis on quotations and citations - Align Left/Center/Right Align sentences to the left, center, right, or spread.
5. Insert Image Inserting images into content can be done via URL or by uploading image files from your computer.
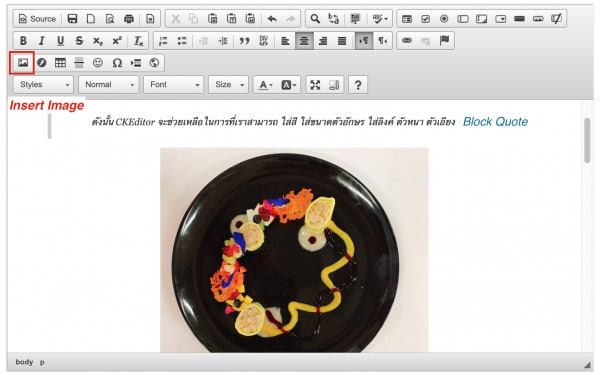
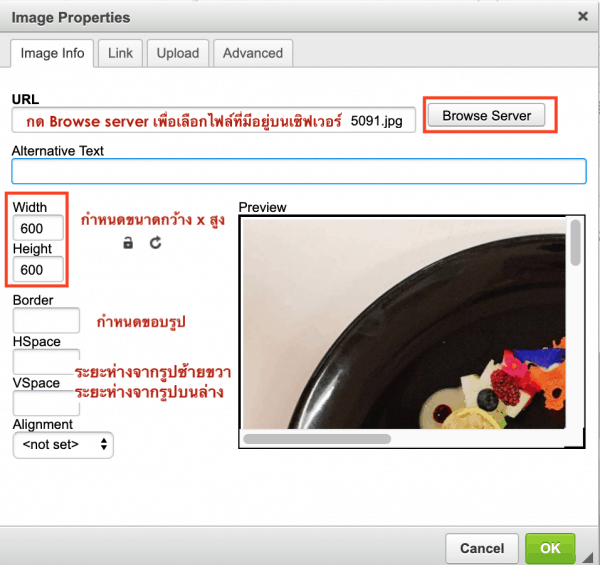
5.1 Click on the tool. Insert Image A pop-up will appear as shown in the image below. Select the Image Info tab to select.Images available on the server Set various settings as shown in the picture, then press OK.
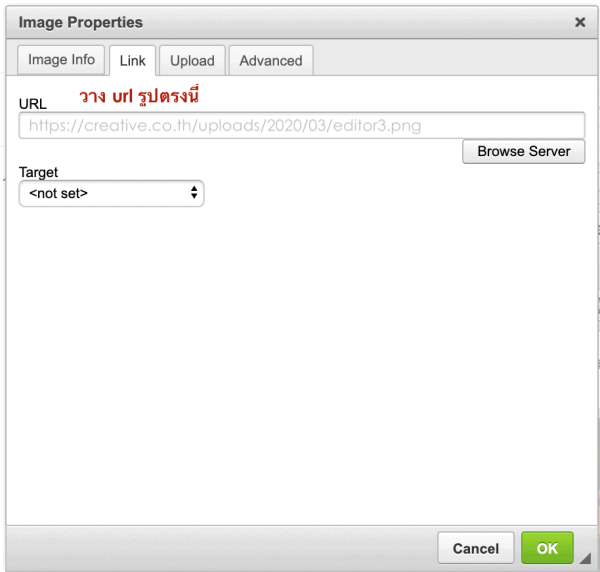
5.2 Click the Link tab toEnter the image URLThere may be images from various file-sharing websites, images from neighboring websites, etc.
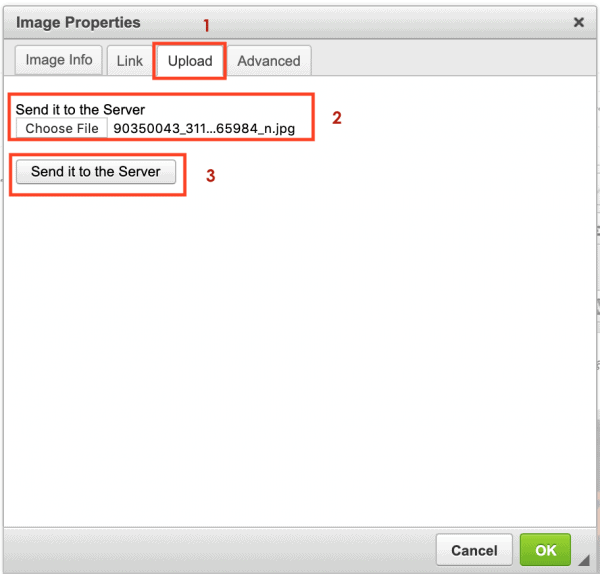
5.3 Click the Upload tab toUpload our own image files from the device. Press the Choose File button to select an image, then press Send it to the Server to upload the image file to the server. Then you can set various settings and click the OK button.
The selected images should not have a file size that is too large, as this will cause our web page to load slowly.
The ideal size is 100 – 1000 KB and supports formats gif, jpg, png.
